1. The attitude.
Bake happy. ONLY. If you need to bake and you are not happy, GET HAPPY. The number one way I have trashed cakes and pastries is trying to create them with a sour pus. Bad idea.

2. Prep your pan.
The worst thing EVAR is having a cake fall apart. There was a time when I would happily bake a cake, take it out of the oven, and beg it to fall onto my cooling rack smoothly. It turns out, you can't reason with cakes. So these are the three (almost) fool-proof tricks to getting that cake out smoothly. I do all three every time, and it has never done me wrong.
A) The perfect mix. Don't even think about spraying your pan with non-stick nonsense. Make a mixture of one part vegetable oil, one part flour, and one part vegetable shorting. It should be the same consistency as your cake batter. Paint your entire cake pan with this mixture.
B) Invest in parchment paper!! Cut out a piece that fits the bottom of your pan only. It's okay for it to bend up over the sides a tad, but that's all you need. Apply this over the mixture.


C) Shortly before taking your cake out of the oven, fold and place a thick bath towel in the sink. Run piping hot water on the towel, soaking it completely. And I mean hot. Hotter than hot. When you take your cake out of the oven, place it directly on the piping hot towel for at least 30 seconds. As it sits, you can sometimes see the cake release from the sides of the pan!

When you're thirty seconds are up, turn the cake onto your cooling rake, and revel in the amazingness of the perfectly shaped cake.

"Why yes, I am a wizard."
Okay, so you have your beautiful cakes, but they're rounded on the top. COME ON!! If you stacked these puppies it would be too thick, not enough frosting, and it would resemble something you might see in a clown mirror. You'r better than that. This is where fancy tools really come in handy.
3. Check out the Wilton Large Folding Cake leveler.

You can see my cake leveler behind the perfect cake and mini cake taco.
I use this to level cakes, and also slice my layers. You can go cheap and get a lesser slicer, or even use a knife - or you can have a perfectly level cake. Up to you, my friend.

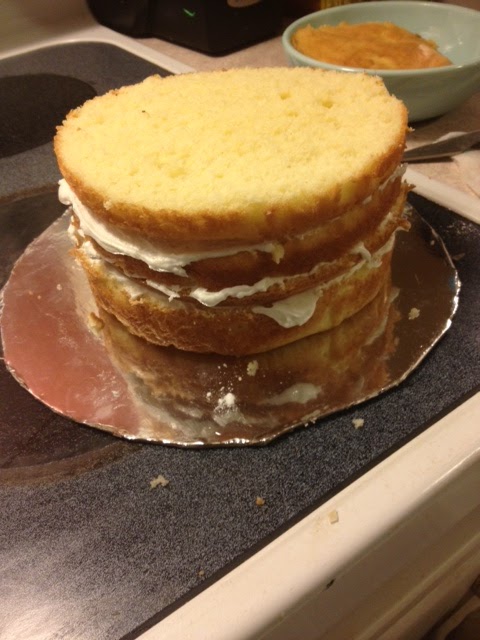
Okay, so your fantastic cakes are leveled, layered and looking fantastic. Straight out of cake boss. So what would the cake boss do next? If you're hearing his voice over in your head right now, it should be saying two. Magical. Words. DIRTY ICING.
4. Dirty Icing
Get a separate bowl of frosting, and a separate frosting tool and ice the cake. Top to bottom. Be generous, and watch as the annoying crumbs ruin the frosting job. As ugly as it is, never fear. This is just a crumb coat. After your cake is dirty iced, place your cake in the fridge for at least 20 minutes. This will seal in the pesky crumbs and allow you to ice over a month, hard, crumb free surface. Shabam.This is pretty much it for my tips and tricks.

Crumb coat? More like YUM COAT!
For this cake, I am doing simple ribbon frosting in three colors. I wasn't worried about frosting presentation quite as much as usual, so I used a white dirty icing instead of something closer to what I piped.

For the ribbon/ruffle technical I used rose petal tips.


Yes, that is my dt. dew. Don't judge.

Ta da. Now I bet you're wondering why the hell I made such an obnoxious cake.
Share some of your favorite cake baking tips in the comments :)
No comments:
Post a Comment